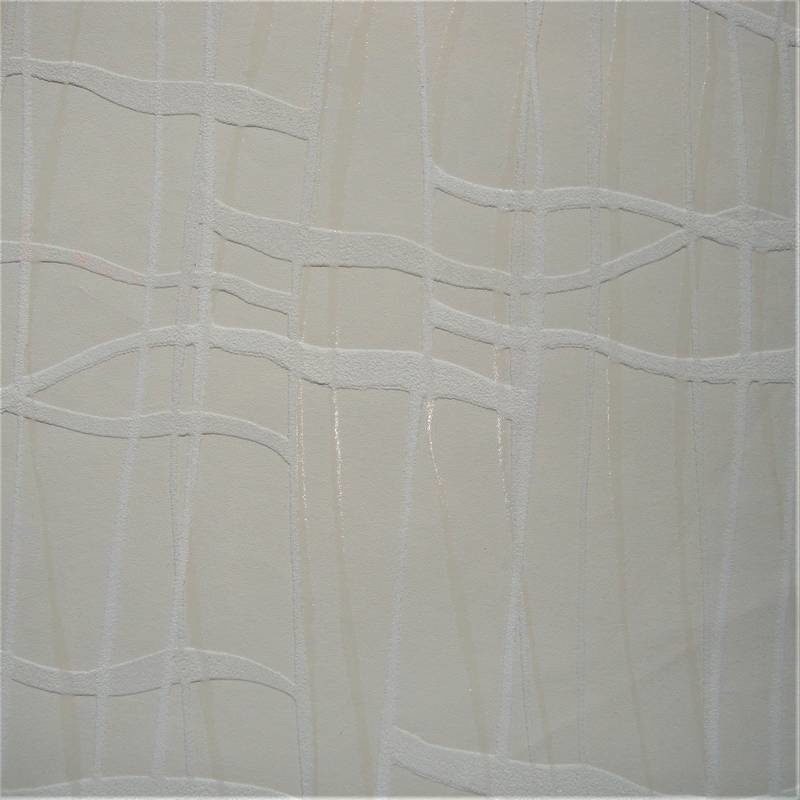


Wallpaper Monstera Plain
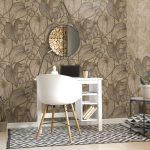
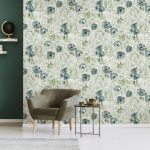
Monstera is a household plant with large, impressive leaves really pulls its looks. Tropical feeling for your own four walls. How part of the wall will cover the plant is up to you, since the design is available as a Monstera with all surface coverage, as a Monstera Twin Wall where the plant dominates the lower half and the background in the rest but also as a Monstera Plain if you only want the elegant background.
For online orders visit our eshop WallpaperStore.gr.
*The colors may have slight deviations depending on the settings of the screen on which they are displayed.
- Additional information
- Installation
- QUESTION ABOUT THE PRODUCT
Additional information
| Εταιρεία | |
|---|---|
| Συλλογή | |
| Price code | |
| Διαστάσεις Ρολού | |
| Κάλυψη Επιφάνειας | |
| Επανάληψη Σχεδίου | |
| Σχέδιο | Plain, Textures |
| Υλικό | |
| Ειδικά Χαρακτηριστικά | |
| Αντοχή στον ήλιο | |
| Ιδιότητες | |
| Τιμή ανά |
How to prepare your wall
The wall surface should be:
- Flat
- Clean
- Dry
- Free of mildew, grease, or other stains
For best results, apply your Wall Covering to a wall surface that has been painted with one coat of primer. If the paint is old or flaking, priming is highly recommended. Old wallpaper and adhesive should be removed by sanding or adhesive remover and primer should be applied to the clean, smooth wall surface prior to application.
How to measure your wall
Knowing how to accurately measure a wall will help with many home improvement projects and will lead towards a successful outcome, towards a wall you can be proud of and one you will want to invite friends around to see. Once you have decided which wall you want to decorate first, you will need to decide just how much of your wall you want to cover. Remember that a full wall design is going to give you the greatest impact, and we all enjoy that WOW factor. A partial wall design will add extra colour, interest and can provide a talking point or theme for your room.
Measuring Tips
Width – measure the horizontal distance from corner to corner. We recommend that you measure both the top and bottom of your wall as walls are never perfectly square. If different, choose the larger width measurement. Height – we recommend that you measure the vertical height at each corner as walls are never perfectly square. As before, if they are different choose the larger measurement. Remember do not include any skirting boards or coving within your measurements. Please note, we custom make all wall coverings to the specific dimensions you supply. To allow for slightly uneven walls we add an extra 2cm of bleed to the height and width of the overall print.
How to hang your wallpaper
There are two styles of installing a wallcovering. Overlap and edge to edge. Before starting, make sure you know which kind of installation your wallcovering requires by laying out the panels and matching the patters. Overlap: Once the first panel is correctly hung, start hanging the following panels, taking as a reference the first panel, the second panel should overlap by 0.5 centimetre. Smooth down the wallcovering in the same way you did with the first panel. Edge-to-edge: Once the first panel is correctly hung, start hanging the following panels, taking as a reference the first panel edge. Place the following panel edge at the same level of the previous panel edge. Make sure you match the print of the two panels at eye level.
Step 1
Prepare the wall
- Clear furniture and other obstructions from your work area.
- Draw a line at the width of the first panel on the wall and plumb, this line must be vertical to ensure proper installation of the wallpaper.
Step 2
Prepare the panels: PRE-PASTED
- Lay out the first panel to be installed on a clean surface
- Wet with water using a pasting brush.
- Book the wet wallpaper by folding over one end into the middle and repeat with the other end.
- The panel should remain folded for approximately 1 minute.
- Unfold the top half of the panel leaving the bottom half of the panel folded.
Prepare the panels: PASTE THE PANEL
- Mix paste as per manufacturers instructions.
- Lay out the first panel to be installed on a clean surface
- Apply wallpaper paste using a pasting brush. Apply the paste from the top to the bottom and from the centre to the edges.
- Book the pasted wallpaper by folding over one end into the middle and repeat with the other end.
- Unfold the top half of the panel leaving the bottom half of the panel folded.
Step 3
Installing your wallpaper
Please note: The panel installation process is the same for all types of wallcoverings. We recommend hanging the first panel in a part of the wall without doors or windows.
- Start by placing the first panel at the top of the wall, using the vertical line that you drew before as a reference.
- Smooth down the paper with a wallpaper hanging brush, working from the top centre to the bottom edges, ensuring that there are no air bubbles and that the edge stays on the pencil line.
- Following the style if installation decided earlier, install the remaining panels
- Overlap: Once the first panel is correctly hung, start hanging the following panels, taking as a reference the first panel, the second panel should overlap by 0.5 centimetre. Smooth down the wallcovering in the same way you did with the first panel.
- Edge-to-edge: Once the first panel is correctly hung, start hanging the following panels, taking as a reference the first panel edge. Place the following panel edge at the same level of the previous panel edge. Make sure you match the print of the two panels at eye level.
Step 4
Trimming and finishing
- Using a straightedge push the wallpaper flush against the wall and into the joining edge along the ceiling, the skirting board and wall edges.
- Trim the edge of the Wall Art along the ceiling, the baseboard, and wall edges using a sharp utility knife. TIP: The knife blade must be sharp to prevent tearing, freshen the blade frequently.
- Hanging wallcovering around light switches or sockets. Safety first, ensure the power to the sockets has been turned off before uninstalling the fitting cover.
- Hang a panel over the fitting and smooth it very gently over it. Make a hole in the wallcovering where the centre of the fitting is placed with the scissors. Remove the wallcovering surplus from the fitting. Be careful when removing it, and never exceed the fitting cover size. Mount again the fitting cover.
Step 5
Hanging wallcovering around light switches or sockets
- Uninstall the fitting cover Hang a panel over the fitting and smooth it very gently over it. Make a hole in the wallcovering where the centre of the fitting is placed with the scissors.
- Remove the wallcovering surplus from the fitting. Be careful when removing it, and never exceed the fitting cover size.
- Mount again the fitting cover.
Wallpaper Monstera Plain
INFORMATION AND REQUEST FOR OFFER
Please fill in your details in the form below or call us at 210 7217647 to discuss your project.